Installation
Outline
- General installation instructions
- Installing and using EasyUnit with Metrowerks CodeWarrior (Windows)
- Installing and using EasyUnit with Bloodshed Dev-C++ (Windows)
- Installing and using EasyUnit with Visual C++ (Visual Studio 2002, Windows)
- Installing and using EasyUnit with g++ (Unix, Linux)
General installation instructions
Installing and using EasyUnit is pretty straightforward. If you are using one of the IDE described bellow, you may use the supplied binary such as easyunitcw.lib. EasyUnit 1.0 now provides a binary for Borland C++ Builder 5.5. If you use another environment you will have to build easyunit which is easy to do! If you are using the embedded version, there is no binary supplied since EC++ compilers and libraries are usually adapted to each kind of device.
The fastest way of using EasyUnit is to unzip the easyunit release in your project folder. Then, you should have a subfolder named easyunit that contains the header files such as testharness.h and a binary file such as easyunitcw.lib. Make your project depends on easyunit library. This is usually done by adding the library to the linker path. Include “easyunit/testharness.h” in every test case and you’re done!
Installing and using EasyUnit with Metrowerks CodeWarrior (Windows)
The following steps will guide you through the installation of EasyUnit with CodeWarrior
- After you have downloaded easyunit-version-win.zip, unzip the file.
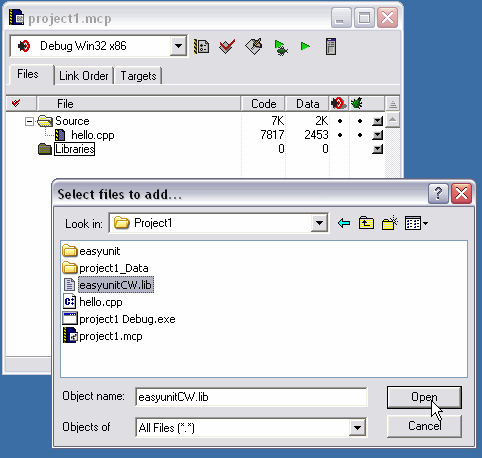
- Copy easyunitCW.lib in the codewarrior project folder (folder of the .mcp file).
- Copy /easyunit folder into your project folder.

- In your project, create a new group called "Libraries":
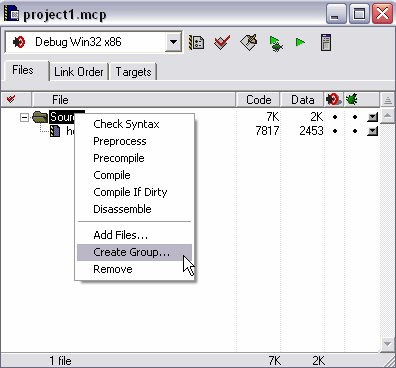
- Add in this group easyunitCW.lib:
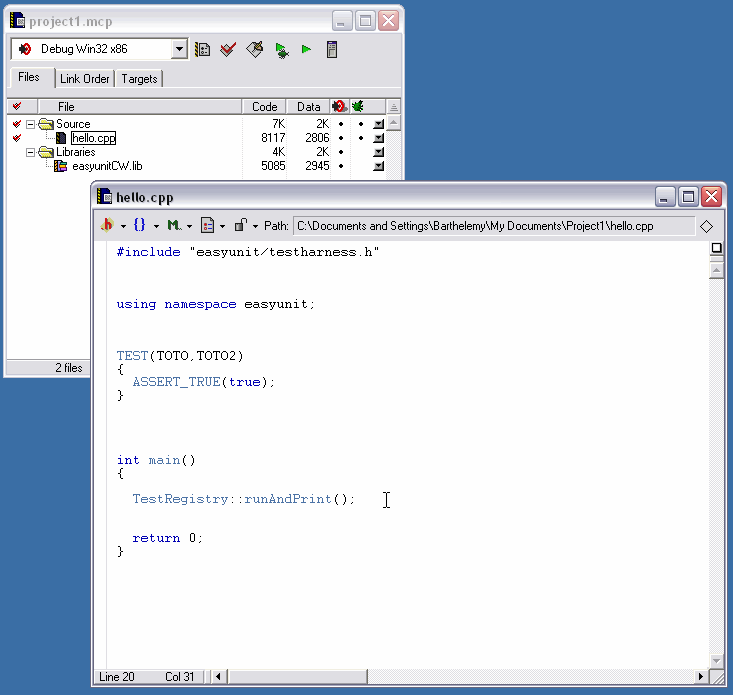
- To create a test, include "easyunit/testharness.h" and indicate that you will use the easyunit namespace:
#include "easyunit/testharness.h"


using namespace easyunit;
To start your tests, you just have to call the runAndPrint() static method of TestRegistry:
TestRegistry::runAndPrint();
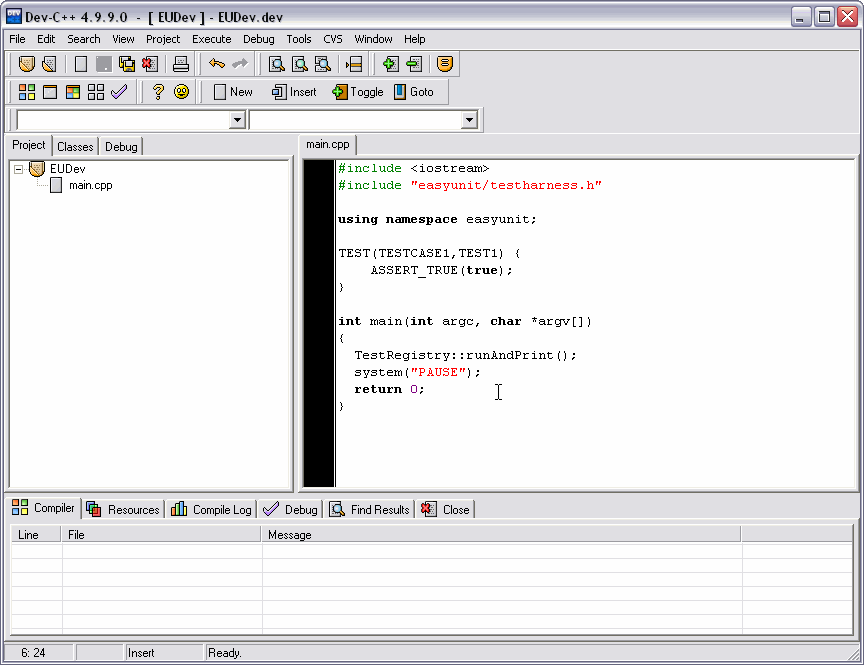
Installing and using EasyUnit with Bloodshed Dev-C++ (Windows)
The following steps will guide you through the installation of EasyUnit with Bloodshed Dev-C++.
- After you have downloaded easyunit-version-win.zip, unzip the file.
- Copy libeasyunit.a in the dev-c++ project folder (folder of the .dev file).
- Copy /easyunit folder into your project folder.
- Go to project properties (menu Project / Project Options) in the parameters section.
- Push the "Add Library or Object" button and add libeasyunit.a :
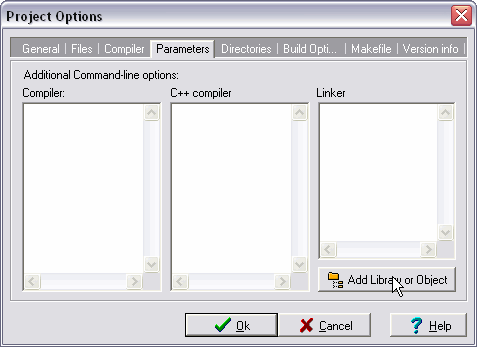
- Push on OK..
- To create a test, include "easyunit/testharness.h" and indicate that you will use the easyunit namespace:
#include "easyunit/testharness.h"


using namespace easyunit;
To start your tests, you just have to call the runAndPrint() static method of TestRegistry:
TestRegistry::runAndPrint();
Installing and using EasyUnit with Visual C++ (Visual Studio 2002, Windows)
The following steps will guide you through the installation of EasyUnit with CodeWarrior
- After you have downloaded easyunit-version-win.zip, unzip the file.
- Copy easyunitVC.lib in the visual studio project folder (folder of the .cvproj file).
- Copy /easyunit folder into your project folder.
- Go to project properties (menu Project / project_name Project Properties) in the Linker / Input section.
- Add the easyunitVC.lib file in the textbox "Additional Dependencies":

- Push Ok.
- To create a test, include "easyunit/testharness.h" and indicate that you will use the easyunit namespace:
#include "easyunit/testharness.h"


using namespace easyunit;
To start your tests, you just have to call the runAndPrint() static method of TestRegistry:
TestRegistry::runAndPrint();

Installing and using EasyUnit with g++ (Unix, Linux)
A binary (libeasyunit.a) for gcc is available with the easyunit unix distribution. You may also build easyunit with the makefile.
- After you have downloaded easyunit-version-unix-tar.gz file, unzip the file:
tar -xvzf easyunit-version.tar.gz. - Copy /easyunit folder in the project folder.
- Copy the libeasyunit.a binary or build your own version with the makefile:
cd easyunit-src

make - Build your project and ensure to add the binary library (usually with -L option).
| <- | ToC | Compiling and Building EasyUnit-> |
© 2004 Barthélémy Dagenais
EasyUnit is released under LGPL